Friday, 31 May 2013

Cake Pops


 Last year, I got hooked on the 'cake pop' craze that hit the caking community. I tried the crumbling cake and moulding pops by hand method and found the pops ended up too sweet for my liking. I also found the whole process quite tedious so I invested in a cake pop mould.


For the actual cake pops I use the following ingredients and do the creaming method:

175g butter
175g Flour
175g Caster sugar
3 eggs
1 teaspoon vanilla extract
3 teaspoons water


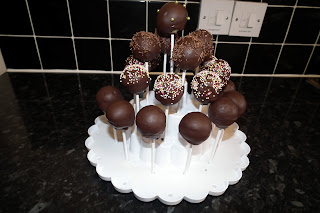
I spray the mould with cake release before adding spoonfuls of cake batter into the bottom section (without the holes). I then put the 'lid' on and bake in a preheated oven for about 15 minutes and voila, perfectly formed round cake balls.

Once cooled,  dip cakepop stick into melted chocolate and push into a cake ball. Refrigerate for a few minutes for the chocolate 'glue' to harden. Then dip the pops into melted chocolate and once chocolate is set, decorate with contrasting chocolate.


Fathers' Day

Fathers' day is only a couple of weeks away. I am already planning the meal for hubby. This year, I hopefully will incorporate some vegetables from our garden as an appreciation of all hubby's hard work in the garden.


Last year, I packed the kids off to a friend's house and made a meal for 2.

                                                                                                              Starter


Peri-peri chicken livers on a bed of rocket salad topped with bacon lardons


               Main

 Fillet steak atop a fondant potato served with sprouting brocolli, baby roast parsnips button mushrooms and mushroom chasseur sauce

                                                                                    Dessert


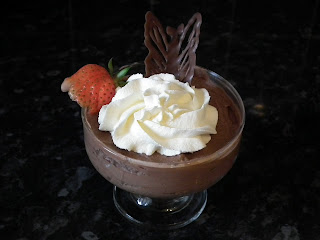
Chocolate mousse served with whipped fresh cream and garnished with a strawberry fan and a chocolate butterfly (my husband's acquired totem!)


The cake was heavenly chocolate cake covered in chocolate ganache with chocolate moulded tool box and tools.


Bridal Shower Cake

 A not so simple cake journey from start to finish


Cake making is such a therapeutic excercise for me. Saying that though, the journey involves a lot of YESSSSSSSSSSSSS and air punching, when something works out well and ARGHHHHHHHHHH's when it doesn't go as it should! One of the ARGHHH moments is during cutting out letters. Nevertheless, I do enjoy both these and will find any excuse to make cake!

                                  This cake was for a friend for her bridal shower.


I started off with covering a cake board in white fondant then used an imprint mat for the design, I set this aside to dry.


For the cake

Ingredients:
350g Flour
350g Butter
350g Caster sugar
6 eggs
2 teaspoons lemon Extract
6 teaspoons water

To Make:

1. Preheat oven to 1500C (this is for fan assisted ovens)
2. Sift flour 3 times and set aside (I use the McDougalls Supreme Sponge self-raising flour so I do not add any raising agent) 
3. Cream the butter until very soft, add the sugar and cream until very light and fluffy
4. Add the extract (I find lemon extract adds a unique taste to the sponge but you can add any flavour of choice)
5. Add eggs, one at a time and mix well
6. Add the water then gently fold in the sifted flour and pour batter into your prepared tin


Once cooked cool on a wire rake for a few minutes then turn out to cool completely


Level the cakes and let cool, then sandwich with filling of choice. I filled this with buttercream and strawberry jam.


I covered the cake in chocolate ganache (forgot to take pictures of these stages). The cake was then covered in light blue fondant. For the dress, I cut panels of white flower paste and attached to cake with water folding the pleats before attaching to cake. The bodice was cut free-hand and the holes punched out with a number 2 nozzle. For the belt, I used a fondant bead maker.

To finish off, I sprayed pearl Edible Lustre Spray over the whole cake and its done!


Sunflower Birthday cake


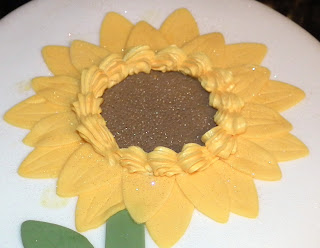
For the sunflower, I used yellow tinted flower paste and cut the petals free hand. The centre was flower paste tinted brown and I used a star nozzle to punch tiny almost holes then did a start border with the same nozzle. I was quite please with how it came out.


Growing our own vegetables is like growing our own money

Growing up, we always had vegetables fresh from the garden everyday. This year, we have decided to grow as many vegetables as we possibly can fit in out small garden.


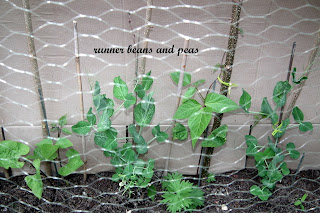
Last year we had a problem with white butterfly lavae munching on the green leaves. So this year, we are adamant we will not share our vegetables with them so hubby came up with the idea of covering the vegetable patch with netting. Seems to be working so far. (trying to stay away from using chemicals to control pests) Keeping our fingers crossed.


 To aid grown, we used the Rootgrow seaweed (hubby loves researching and reading up reviews and this came with good reviews so we gave it a go).


The results were A.MA.Z.I.N.G

I cant wait for the other veg to grow and GET COOKING! I will be posting pictures and recipes of the goodies I will be cooking with my fresh from the garden veg.